Another thought on Pies

Directions @ www.notmartha.org

Twix-a-like

Recipe @ www.kingarthurflour.com

Bread Recipe

Recipe @ deliacreates.blogspot.com

Pizza on a stick

Recipe @ chiccookiekits.blogspot.com

Lollipop Cookies


Recipe @ fromanigloo.blogspot.com

The Absolute Best Playdough Recipe


Instructions @ fromanigloo.blogspot.com

Lemon Sugar Hand Scrub


Step by step instructions @ www.bystephanielynn.com

Soap Balls


Step by step instructions @ www.bystephanielynn.com

Vanilla Brown Sugar Body Scrub {for Mom}


Step by step instructions @ www.bystephanielynn.com

Homemade Hamburger Buns

Hamburger Buns in 30 minutes:

3 1/2 cups warm water
1 cup oil
3/4 cup sugar or 1/2 cup honey
6 T. active dry yeast
1 T. salt
3 eggs, beaten
10 1/2 cups white or wheat flour (For company we usually use 4 cups wheat to 6 bread flour then add bread flour as needed, but this is wonderful with all whole wheat.)

Mix first 4 ingredients and let rest for 15 minutes. It should get sponge and get bubbly. Add remaining ingredients. Mix, then knead for 5 minutes. Preheat oven to 425. Roll out to 1/2″ thick. Shape immediately. I use the ring from a wide mouth canning jar for hamburger buns. You could also make child size buns. Let rise for 10 minutes. Bake for 10 minutes or until done.

Taken from: http://raisingolives.com

Homemade Snickers Candy Bar


Recipe @ http://www.instructables.com/id/Homemade-Snickers-Candy-Bar-Recipe/

Crafter's Blog Finally Up


Check out my new Crafter's Blog!

Apple Facial

Apple Facial
Sonya Dakar's Apple Facial Recipe


Mimi Dakar, co-founder of the Sonya Dakar Facial Clinic in Beverly Hills, California, shares an at-home recipe for a revitalizing apple facial.


Key Facts:
• Apples are rich in antioxidants as well as vitamins A, C and E
• Cooking fruits develops pectin, which contain vitamins and minerals that are beneficial to skin

Ingredients:
• 1 organic green apple
• ½ cup of water
• ¼ cup of witch hazel
• ¼ cup of apple cider vinegar

Directions:
• Cut an organic green apple into small cubes
• Leave the peel on but remove the seeds
• Combine apple with 1/2 cup water in a saucepan and bring to a boil
• Once it boils, remove saucepan from heat and allow it to cool completely
• Strain the mixture through a fine mesh sieve into a clean bowl
• Stir in 1/4 cup of witch hazel
• Stir in 1/4 cup of apple cider vinegar
• Apply the mixture with a clean cotton ball, or pour it into an empty spray bottle and spritz on
• Leave on for 15 minutes, and wash off with a warm cloth
• Repeat once a week!

Link: http://www.thedoctorstv.com/main/show_synopsis/430?section=feature&title=Apple Facial Facial

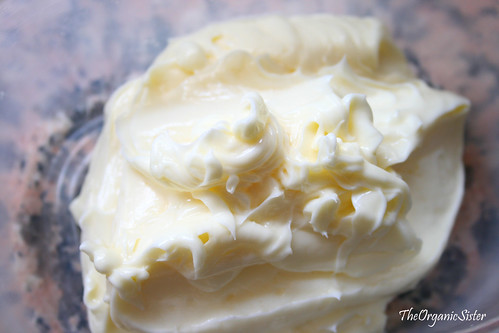
Homemade Butter

Learn how to make homemade butter today:


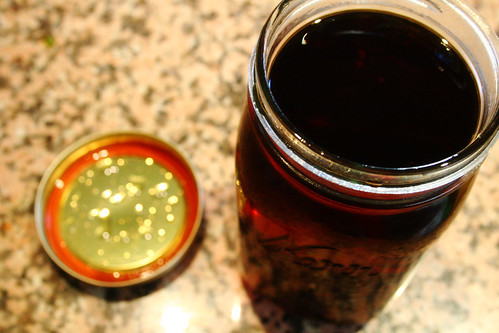
Homemade Vanilla Extract

Check out how to make homemade vanilla extract here:

Homemade Toys for Infants

Musical and Visual Rolling Toys

1) Decorate old formula tins with pictures and clear contact paper. Inside, place some dry rice and pasta. Ensure lid is attached securely. As the tin is touched by the child it will roll forward enticing an infant to move forward to chase the tin and sound along.

2) Fill plastic bottles and jars with:

•Water, glitter and food coloring, •Tri-colored pasta,
•Colored water and cut straws, or,
•Colored rice (this can be made with food coloring and water in a cup, add uncooked rice, drain water and lay rice in trays in sunny spot to dry out completely).
These filled plastic bottles encourage infants to grasp, lift, turn, shake and roll containers.


Fine Motor and Coordination
•Colored or wooden pegs for dropping into plastic bottles. This will develop hand/ eye coordination (use solid pegs as pegs with hinges can pinch and have small removable parts)
•Poke a silky scarf into a cardboard cylinder and show your child how to put it in and take it out
•Use covered small tissue boxes to build towers to stack and knock down
The most important thing to remember is safety when making homemade toys. Ensure all lids are securely glued and taped on as small objects may be a choking hazard.

Have fun playing with these homemade toys with your baby. Model how to roll, manipulate, shake and use the toys and they will attempt to copy your actions. It is through practice that children learn to master their body movements and learn new skills!


Read more: http://www.brighthub.com/education/early-childhood/articles/38153.aspx#ixzz0UOnkaZQ5
Making a Toy Block for an Infant
Use the foam and cloth to create a soft block. Now, wrap the block around and sew its end nicely.
Remember, it’s necessary for the toy to stimulate the child. For this, use different textures of clothing.
Now, cut the blocks from sponges to make various bath blocks. These bath blocks are very sensitive and can be squeezed even by the infant with the help of his small fingers. Also, since these are quite expendable, you can make another one to be used the next time, easily.
You can also make some large bricks with the help of some empty tissue boxes and paper. Now, cover these boxes and make sure that you decorate them beautifully.
Baby Books
Take pictures of all of the important people and things in your baby's world. Include several pictures of your child as well. Infants love to look at pictures. Buy a scrapbook or photo album, and place the pictures in the book. Use words to describe the name of the person or thing on each page. You can either use the sticker lettering that is typically used in scrapbooking or use colored markers. If you would like to make an alphabet book, take pictures of things starting with each letter of the alphabet and place in your book with big letters underneath the picture.
Loud Toys
Grab some old, clean socks, tissue paper and a needle and thread. Crinkle up several pieces of the tissue paper and place in the clean sock. Use the needle and thread to sow up the open end of the sock. Children love toys that make sounds. This "toy" will make sounds every time they grasp it.Another idea is to gather an old coffee can, some rocks and a glue gun. Clean the coffee can and place rocks in the can. You can use any type of rock. Glue the top of the container onto the coffee can so the child cannot open the can. The size of the rocks could be a choking hazard, which is why the lid must be sealed tightly on the can. This can be rolled back and forth to make all of the loud noises that your child desires.

World of Felt
Because felt naturally sticks together, you can do a lot with it. Buy a large piece of white or black felt. This will be used as the backdrop for all designs. You will then need to purchase many pieces of colorful felt in order to make your shapes. You will also need to purchase two-sided adhesive to stick the white or black backing to the wall. Now, you can design your shapes. First start with different colored circles and triangles and squares. If you desire, you can then create trees, flowers, houses and animals. Your child can begin to make any design that she likes. This can be used over and over again and will not create a mess for you to clean up.
Sock Doll
This is a great project to make with an older child – and helps you use up stray socks. You will need:* 3 ankle socks* Sewing machine or needle and thread* Stuffing material (cut up fabric, socks or foam work well)* Scissors* Decorations such as embroidery thread, markers and yarnCut off the first ankle sock at the heel, stuff it, and sew up the bottom. It will look like a fat sausage with the toe of the sock as the head. Cut the second ankle sock in half horizontally, turn it inside out, and make a vertical cut up the center starting at the toe and stopping one inch from the cut end. Stitch the vertical cut closed on either side to form the two legs attached at the top. Turn the legs right side out, stuff them and sew the top of the legs closed. Sew the legs to the body. Repeat this step for the arms, but make them shorter. Cut all the way through the sock to make two separate arms. Sew them to the body about four inches from the top of the head. Take strong thread and sew ¼” stitches around the head just above the arms, pulling tight to form the neck. You can also do this by tying it off with string or ribbon.
Bottle of Ocean
Take a clear plastic bottle and fill it half full with water. Add a few drops of blue food coloring. Add vegetable oil until the bottle is 2/3 full and then add baby oil until the bottle is full. Glue the cap on tight, hold the bottle horizontally and shake the bottle gently to see the movement of your very own ocean. Baby oil can be toxic to young children, so make sure they can’t get to the contents.

Baking Powder Recipe


Royal Baking Powder was a single-acting product made years ago. Here's a recipe for single-acting baking powder you could use in old recipes calling for Royal brand.
  • 2 tablespoons cream of tartar
  • 1 tablespoon baking soda
  • 1 tablespoon cornstarch

Combine ingredients and store tightly covered. For double-acting baking powder, use 1/4 teaspoon of baking soda and 1/2 teaspoon of cream of tartar for each teaspoon needed.


Here is some interesting info i found on store bought baking powder:

“Aluminum in baking soda?

In striving for clarity, baking SODA is (by definition) sodium bicarbonate, a chemical that is extracted from the ground.  It does not contain aluminum nor is aluminum added to it in processing either by intention or through aluminum equipment. 

Baking POWDER is manufactured with baking soda as an ingredient and typically includes a compound containing aluminum.  Marketing baking soda as aluminum-free is simply a marketing strategy to play to consumers' confusion while charging more for it.  As has been noted, no baking soda has aluminum in it. 

Aluminum in baking powder has been known to contribute to a bitter taste. So switching to aluminum-free baking powder should eliminate that problem. “

http://www.welltellme.com/discuss/index.php?topic=14397.0

~ I’m not saying this information is correct, i haven’t searched it out.

My Thoughts on - ‘Toothpaste #3’

Tonight i tried the last toothpaste recipe on this post: Toothpaste Post

I used regular sugar instead of stevia and ended up using 1/2 teaspoon (it probably could have used a bit more)

I also used peppermint extract instead of ‘oil’ and i don’t know if they are actually different or basically the same thing.

It did end up very salty tasting and only slightly minty. But the up side is that it does not leave any after taste so you don’t have to keep on tasting that salty flavor… which is good.

It seems to work well, although this is only my first time using it. My true test will be having my husband, who is really picky, try this. I think it would be something i would continue using. The salt taste is standable, and i believe that could lessen with more sugar and more flavorings.

At Wal-Mart in their craft/wedding section i bought some containers that almost look like old cafe ketchup bottles. I used that to put my homemade toothpaste in and i think it worked very well (although i had to prop it upside down).

I’ll write more after i get more info and opinions on it.

Toothpaste 1

Mint Toothpaste
Ingredients:

  • 6 teaspoons baking soda
  • 1/3 teaspoon salt
  • 4 teaspoons glycerin
  • 15 drops peppermint or wintergreen extract
Directions: Mix thoroughly. Should be a tooth paste consistency. Store in a container. You'll be surprised with how fresh your mouth feels.
~~~~
Super Cleanser
Ingredients:
Directions: Make a paste by combining the two ingredients. Use this paste on your teeth and also gently rub along your gums two times a week.

My Thoughts on - 'Coffee Rinse'

This afternoon i tried the Coffee Rinse on my hair. I had a question about it... and wondered what kind of texture it would give my hair, if it would make it sticky or so on.

It actually didn't make my hair feel any different. I sure smelled good though. I suggest using an old towel to dry your hair on when you do this, because coffee can stain.

I can't say I've really noticed a difference in my hair but this is my first time doing it. I plan on doing it several times before i decide what i really think of this recipe/idea.

If i find something else out, i will post it for you.

Coffee Rinse Recipe: Click Here