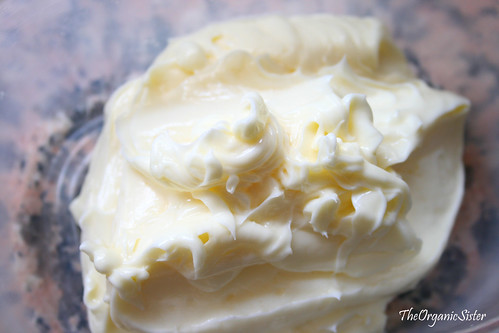
Learn how to make homemade butter today:

 •Colored or wooden pegs for dropping into plastic bottles. This will develop hand/ eye coordination (use solid pegs as pegs with hinges can pinch and have small removable parts)
Combine ingredients and store tightly covered. For double-acting baking powder, use 1/4 teaspoon of baking soda and 1/2 teaspoon of cream of tartar for each teaspoon needed.
Here is some interesting info i found on store bought baking powder:
“Aluminum in baking soda?
In striving for clarity, baking SODA is (by definition) sodium bicarbonate, a chemical that is extracted from the ground. It does not contain aluminum nor is aluminum added to it in processing either by intention or through aluminum equipment.
Baking POWDER is manufactured with baking soda as an ingredient and typically includes a compound containing aluminum. Marketing baking soda as aluminum-free is simply a marketing strategy to play to consumers' confusion while charging more for it. As has been noted, no baking soda has aluminum in it.
Aluminum in baking powder has been known to contribute to a bitter taste. So switching to aluminum-free baking powder should eliminate that problem. “
http://www.welltellme.com/discuss/index.php?topic=14397.0
~ I’m not saying this information is correct, i haven’t searched it out.
Tonight i tried the last toothpaste recipe on this post: Toothpaste Post
I used regular sugar instead of stevia and ended up using 1/2 teaspoon (it probably could have used a bit more)
I also used peppermint extract instead of ‘oil’ and i don’t know if they are actually different or basically the same thing.
It did end up very salty tasting and only slightly minty. But the up side is that it does not leave any after taste so you don’t have to keep on tasting that salty flavor… which is good.
It seems to work well, although this is only my first time using it. My true test will be having my husband, who is really picky, try this. I think it would be something i would continue using. The salt taste is standable, and i believe that could lessen with more sugar and more flavorings.
At Wal-Mart in their craft/wedding section i bought some containers that almost look like old cafe ketchup bottles. I used that to put my homemade toothpaste in and i think it worked very well (although i had to prop it upside down).
I’ll write more after i get more info and opinions on it.
Mint Toothpaste
Ingredients:
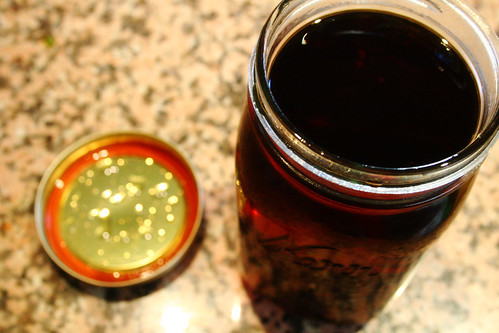
This afternoon i tried the Coffee Rinse on my hair. I had a question about it... and wondered what kind of texture it would give my hair, if it would make it sticky or so on.
It actually didn't make my hair feel any different. I sure smelled good though. I suggest using an old towel to dry your hair on when you do this, because coffee can stain.
I can't say I've really noticed a difference in my hair but this is my first time doing it. I plan on doing it several times before i decide what i really think of this recipe/idea.
If i find something else out, i will post it for you.
Coffee Rinse Recipe: Click Here

I have personally been using this Laundry Soap for about 6 months or so. I think it is wonderful and so easy to make! Plus it is so cheap! I love it, love it!
~ Ammiel
You can make either powdered or liquid soap with the recipe. We’ve done both, but tend to prefer the powder as it’s easier to make and store and seems to work as well as the liquid in my large, front-load washer. Note that this detergent will not create suds. This makes it very good for new, high-efficiency washing machines – but it may look really odd to you if you have a top load machine and peek in while the load is running.
1/3 bar Strong Soap (see below)
1/2 Cup washing soda
1/2 Cup borax
Optional – essential oil for fragrance
Grater or food processor
3 gallon stockpot (for liquid soap)
5 gallon bucket (for liquid soap)
Stove (for liquid soap)
Stick blender (optional for liquid soap)
Air-tight container (for powder soap or extra powder to make more liquid)
Empty detergent bottle (for liquid soap) look for one with a no-spill, self-measuring lid
Note that this recipe is easily multiplied. It’s a lot easier to make a triple batch of powder than a single one. If you’re making liquid soap, you can keep the extra powder in an air tight container until you need it. That way you don’t need to store gallons of liquid at once. For both recipes you’ll need to grate the soap. I use a Cuisinart food processor and the fine grating attachment. I cut the bar in thirds and feed it into the food processor. It makes short work of the job.
If you’re going to make liquid soap you’ll need 6 cups of water and a large (3 gallon) stock pot. Put the water in the pot and put it on the stove on medium heat. Add the grated soap and stir until it dissolves. Then add the washing soda and borax and stir over heat until they are dissolved. If the mix is not dissolving well, carefully use a stick or hand blender to mix it up. Increase heat and bring pot to a boil. Boil for 15 minutes. The liquid should have about the texture of honey.
Take the pot off the heat. Mix it well with a hand blender. Once the soap is dissolved and well mixed, add enough hot water to make two gallons. Add water a quart or so at a time and mix well before adding more to keep the mixture smooth. Add a teaspoon or two of essential oil if desired. A lighter oil (less viscous) with no color is best. We like lemon and cedar,
I use about 1/2 cup per load in my large, front load washer. Make sure the lid on the bottle fits very tight, as it’s best to shake the bottle before using it.
For dry soap, just grate the bar soap and add it to the borax and soda. Stir well, then add essential oil if you want and mix again. About 1-2 Tbsp per load (depending on how dirty the clothes are) works for me.
This soap will not work well if you have very hard water. Adding extra borax to the recipe may help in this case.
Regarding soaps. The most commonly available strong (lye) soap is Fels Naphtha. Fels is a lye and animal fat based soap. It used to contain Stoddard Solvent (or mineral spirits) which made it more effective at removing oily stains. Fels was an old time remedy for poison ivy. If the name or the idea that it used to contain solvents bothers you, you can substitute Octagon Soap or Zote. Fels Naphtha and Octagon are available at our local grocery and hardware stores. You’ll find Zote at a tienda.
Don’t use facial soap. It usually has added oils you don’t want and isn’t an aggressive enough cleaner for laundry.
Or if you are incredibly motivated — and handy (like Audrey is) you can make you own bar soap from lye and rendered lard.
How much does it cost:
Here is the breakdown of my costs and how I came up with those numbers (I am using the prices I paid for these items and you may find your price varies some based on what you pay):
Fels Naptha: $1.12 for a 5.5 oz bar. The recipes says use a 1/3 of a bar. I calculated 2 oz. just to make the math a little easier. The cost of the Fels Naptha per batch is: .40 cents
Washing Soda: $2.23 for a 55 oz. box. This came to .17 cents per batch. I calculated how much per oz (2.23 divided by 55) and then weighed a half cup of washing soda (4.2oz.) and multiplied my per oz. price by 4.2
Borax: $3.27 for a 76 oz. box. This came to .14 cents per batch. Did the same calculations as above, however a 1/2 cup of borax weighs 3.5 oz.
For the final numbers I have .40 + .17 + .14 = .71 for 2 gallons of laundry detergent.
I looked up a few DIY recipes. The easiest calls for one part Borax to one part WASHING soda. The accompanying article includes a helpful cost breakdown.
Amy at Momadvice uses a more kitchen-cabinet-friendly version: 1 cup Borax, 1 cup baking soda, 1/4 cup salt. Test a tablespoon's worth in your next load for effectiveness. If everything's not squeaky clean, add straight vinegar to the rinse compartment next time. I keep mine in a Tupperware canister that's just as easy to pour as Cascade.
Go ahead and buy the giant jug of vinegar. You'll use it to de-stink left-too-long laundry and concoct homemade volcanoes. Borax is handy, too, as a cheap laundry booster and natural insecticide.
http://www.likemerchantships.org/2007/06/how-to-make-dishwasher-detergent.html
~~~~
Recipe for Dishwasher Soap
Dishwasher soap is easy to make, and cost effective. I mix up a batch in an empty canister, and pour it in the dishwasher as needed.
Mix and use per dishwasher load:
1 Tablespoon Borax
1 Tablespoon Baking soda
Mix equal parts Borax and Baking Soda, and add 2 Tablespoons per load. Increase proportion of soda for hard water. Use vinegar in the rinse cycle.
Lorraine
http://www.stretcher.com/stories/02/02dec09b.cfm
Cost Comparison:
Depending on how much you pay for your dishwashing detergent and how much you pour into the dispenser will determine how much you are paying per wash for your detergent and spot removing gel.
The cost for this recipe is less than 4 cents per load.
Calculation as follows:
Cost of Borax: $2.50 for 76 ounces = .03/oz or .015 for ½ oz
Cost for Washing Soda: $2.50 for 55 ounces= 4/oz or .02 for ½oz
Recipe calls for ½ ounce of each so the cost per wash is 3.5 cents. How much does your detergent cost (this week)? Next week the price may probably go up.
~~~~
Liquid Dishwasher Detergent Recipe
1 part baking soda
1 part borax
1 part water
1 drop lemon or orange essential oil per cup of detergent
This is the old-fashioned variety.
1/2 cup ammonia
2 tablespoons cornstarch
1/2 cup white distilled vinegar
1 bucket warm water
Dry the windows with two towels. The second towel will make windows sparkle. NOTE: If cold weather, add 1/2 cup rubbing alcohol to the above mixture to prevent ice from forming on your windows.
Water
1/4 cup vinegar
Put vinegar in dispenser first, then fill with water.
http://recipegoldmine.com/houseT/windshield-wiper-spray.html
3 parts vinegar
1 part water
Put into a spray bottle. Before going to bed at night, spray the windshield and all the windows and mirrors. In the morning, the windows should be free of ice.
1 part vinegar
1 part hot water
Dip roller or sponge into solution and wet paper thoroughly. After two applications, the paper should peel off in sheets.
NOTE: Use a paint roller. It is much more effective than using a brush.
1 box baking soda
1/4 cup ammonia
Make a paste of baking soda and ammonia. Brush on oven and let soak overnight. In the morning wipe off with clear water.
http://recipegoldmine.com/houseO/oven-cleaner.html
~~~~
Oven Cleaner
1 cup ammonia
2 cups boiling water
1/2 cup baking soda
1 cup white vinegar
Heat oven to 200 degrees F. Leave oven on for 15 minutes; turn off and leave the door closed.
Fill a shallow baking pan with ammonia and place on the top shelf of the oven. Fill another pan with 2 cups boiling water and place on the bottom shelf. Close oven and leave pans in for at least 2 hours or overnight. Remove ammonia and make a paste of ammonia, baking soda and vinegar. Spread paste on oven surfaces, leave on for 15 minutes, and then scrub off with a sponge or steel wool.
2 tablespoons baking soda
1 cup water
1/2 cup vinegar
Boil this mixture in the affected cookware for 10 minutes. Re-season the cookware with salad oil.
http://recipegoldmine.com/houseH/nonstick-cookware-stain-remover.html
2 cups milk
2 tablespoons black pepper
2 tablespoons granulated sugar
2 tablespoons brown sugar
Brown paper bags, cut into strips
Boil milk, pepper, and sugar together for 5 minutes. Simmer uncovered 5 minutes longer, until thickened, and then let cool. Wind the brown paper strips into a tight roll and drop them into the milk mixture. Let them become completely saturated. Rewind the strips gently and let them air dry on a cookie sheet. They are ready to hang when they are sticky to the touch.
To use, suspend the strips up and out of the way wherever flies are a problem. CAUTION: Keep the strips away from young children, especially after they are covered with flies.
Submitted to Recipe Goldmine by Barbara Louise - Albuquerque, New Mexico
Source: a gardening forum
Put some water in a white dinner plate and add just a couple of drops of Lemon Fresh Joy dishwashing soap. Set the dish on a porch or patio. No sure what attracts them, the lemon smell, the white color, or what, but mosquitoes flock to it, and drop dead, or fall into the water, or on the floor within about 10 feet. Works just super!
1 ounce beeswax
1/2 cup baby or mineral oil
Melt the beeswax in a microwave or a double boiler. Stir in the mineral oil. Remove the mixture from the heat and stir until cool.
http://recipegoldmine.com/beautypersonal/petroleum-jelly.html
Looking for a natural and wallet-friendly hair spray to keep your 'do in place? Then, give this simple, two-ingredient recipe a try:
Difficulty: Easy
Time Required: 20 minutes or less
Here's How:
Tips:
What You Need:
http://frugalliving.about.com/od/beautyhealthcare/ht/Hair_Spray.htm
Making your own hair gel is as easy as 1-2-3. Give it a try, and enjoy great hair for less coinage.
Difficulty: Easy
Time Required: 5 minutes or less
Here's How:
Tips:
What You Need:
http://frugalliving.about.com/od/beautyhealthcare/ht/Hair_Gel_Recipe.htm
Flour Paste
For frizzy hair.
Flouring is an ancient recipe that smoothes the scales of the hair shaft, making it more manageable.
1 cup flour
2/3 cup cold water
Mix until lumps disappear. Apply to dry, unwashed hair, smoothing the mixture and your hair straight back. Leave on for 20 minutes. Rinse thoroughly about five minutes. Shampoo with one lathering of mild shampoo. Rinse with cool water.
My Personal Comment on Recipe/idea: Click Here
For brunettes and redheads.
8 cups warm brewed coffee
After shampooing rinse hair with coffee. Do not rinse it out. Your hair will be rich and shiny.
Battling a head full of tangles and frizz? Fight back with this frugal leave-in conditioner recipe:
Difficulty: Easy
Time Required: 5 minutes or less
Here's How:
Tips:
What You Need:
http://frugalliving.about.com/od/beautyhealthcare/ht/Hair_Detangler.htm
I've been making my own lip balm for a few years now, and I love the recipe I use so I thought I'd share it here. It's very, very simple. This makes about 3 tubes.
-2 tsp. beeswax (chop or grate it, then measure)
-2 1/4 tsp. jojoba oil (you can use any oil you like, but for me jojoba's the only way to go)
-about 6 drops of peppermint essential oil (again, you can use anything you like. Grapefruit would be good!)
Melt wax and jojoba oil together in the top of a double boiler, or you could probably put it in the microwave for a bit. Stir to combine. Then remove it from the heat and add the essential oil. Pour into your containers, but don't fill up completely yet. Wait a minute or two, keeping the reserved mixture melted, then top the containers with the rest of the mixture. This gives you a nice looking top. Let cool for about 20 minutes and enjoy!
I like a bit of a waxier lip balm, so if you want it glossier just add a bit more jojoba oil.. maybe 3 tsp? Experiment to get it how you like it, that's half the fun!
**********************************************************************************
Edited to add:
There's been a few questions, so I thought I'd add my answers here so they're all in one place.
-Where do you get those screw bottom containers?
I get them from a variety of places but the prices on ebay are the best I've found. Just do a search for "lip balm tube." I also save old ones I've used up and reuse those (only for myself of course!)
-How do you pour the balm in the tube? Do you just pour it from the pot?
I used to use a plastic pipette to get the melted balm into the tubes, but I found a little enamel pot at the flea market and I use that now. The pipettes work fine but the balm will harden in it if you're not fast enough. You can also find these on ebay. Search for "plastic pipette."
-Where do you get your beeswax? Online? Or can I use the left over wax from my honey and just try to remove the remaining honey?
I buy my beeswax from Mountain Rose Herbs or from local beekeepers (check farmers markets). Often they will have little chunks of wax by their displays of honey. I don't see why you couldn't use the wax that's in honey.. I've seen other lip balm recipes calling for honey but whenever I try it the honey separates from the balm, but if you get most off it should work!
-Any suggestions for what type of beeswax to use or where to get it? I noticed "pure," "unfiltered," "pellets," and all other sorts online. What's the difference?
I would take the term "pure" to mean it's just beeswax, no other ingredients are added (also look for 100% beeswax).
Filtered would mean that it's been strained of any other matter that may be in the wax (dirt, dead bees, etc). For use in lip balm I would look for filtered.
The pellets are just beeswax that is formed into little pellets. The pellets would be very easy to use, but I've never bought it because it's a bit more expensive, and, well, I can be sort of cheap sometimes. :)
One type of beeswax I would avoid is the "white" beeswax. The whiteness is obtained by bleaching the wax and I would think some of the many good, healing qualities of the wax would be lost when it's bleached. And I would be worried that some of the bleaching residue would remain on the wax.
I buy everything from Mountain Rose Herbs and I'm always impressed. They're the best company I've found that sells this type of supplies and I love that most everything is organic. They also supply lots of information. You can find the jojoba oil and the peppermint essential oil there as well.
-What sort of other oils would be nice in the lip balm?
I’ve seen different lip balm recipes calling for different carrier oils, including: olive oil, safflower oil, almond oil, castor oil, coconut oil, and sunflower oil. Sometimes they’re combined in one recipe; like castor and coconut oils; or almond, olive, and castor oils. I’ve never tried any of them because I love the jojoba oil.
And as for essential oils, I would think the citrus oils, like grapefruit, lemon, lime, or tangerine would be nice. Stick with edible stuff.. I don’t think lip balm scented with fir needle essential oil would be good, for example. Also be careful which oils you choose, some need to be avoided if you’re pregnant and others can’t be used on your lips or other sensitive areas. Mountain Rose Herbs has all of this information with their essential oils.
-Do you know about any laws in selling lip balm to say a local co-op?
No, I’m not familiar with the laws regarding selling products you’ve made. I would think some sort of preservative would be necessary, like vitamin E or grapefruit seed extract but I could be wrong.
http://greenbeesbees.blogspot.com/2008/09/homemade-lip-balm.html
~~~~
Simple Chap Stick
Makes about 1 oz (4 1/4-oz chap stick tubes)
Ingredients
Instructions
Place all ingredients in heat-safe measuring cup or bowl and place in double boiler, or a medium saucepan of water over low heat. Allow hot water to melt ingredients, but prevent from boiling. When all solids have melted, remove from heat and stir until well combined. Pour into chap stick tubes or lip balm jars and allow to cool completely, uncovered, before sealing or using.
http://hubpages.com/hub/Lip-Balm
~~~~
Ingredients: 3 teaspoons grated unbleached beeswax; 5 teaspoons carrier oil (sunflower, castor, or jojoba); 6 or 7 drops essential oil; 1 teaspoon honey, for flavor
1. Melt the beeswax and carrier oil together in the top of a double boiler, stirring to combine. Remove from heat; add honey and essential oil. Mix thoroughly so the honey does not clump.
2. To add a little color, stir in a tiny dab of lipstick with a coffee stirrer. Pour the mixture into containers; let sit 20 minutes before covering or moving. For glossier lip balm, use 2 teaspoons wax and 8 teaspoons carrier oil.
~~~~
Chocolate Lip Gloss
3 tablespoons cocoa butter
4 or 5 chocolate chips
1 capsule vitamin E
Melt all ingredients in a double boiler, then blend with a spoon until smooth. Put into a container and refrigerate until solid.
http://recipegoldmine.com/beautypersonal/chocolate-lip-gloss.html
~~~~
Vanilla Lip Gloss
1 tablespoon grated beeswax
1 tablespoon coconut oil
1/8 teaspoon vitamin E oil
1/8 teaspoon vanilla extract
Place the beeswax, coconut oil and vitamin E oil in an ovenproof container. Heat gently until the wax and oils are melted. Stir in the vanilla extract and mix well. Pour the mixture into a clean container and allow to cool completely.
http://recipegoldmine.com/beautypersonal/vanilla-lip-gloss.html
#1 Soap-less Lemon, Lime, Orange, or Grapefruit Shower Gel
1 cup of water
1 teaspoon of cornstarch or arrowroot
2 tablespoon of glycerin
1 tablespoon of jojoba oil
1 teaspoon of cane sugar
4 tablespoons of aloe Vera gel
8 to 10 drops of Essential oil – lime, lemon, grapefruit, or orange
1 or 2 drops of yellow food coloring (optional)
Place all ingredients except food coloring in a bowl and mix until smooth. Add food coloring if desired. Pour into a squeeze bottle and use within 24 hours.
~~~~
#2 Pear or Apple Shower Gel
1 bar of unscented glycerin soap
1 cup of water
1/2 cup of pear or apple juice
1 tablespoon of glycerin
3 to 4 drops of lemon essential oil
5 drops of pear or apple fragrance oil
Grate or chop the bar of soap. Place first three ingredients in a large saucepan and bring to a boil over medium heat, stirring occasionally. Lower the heat and simmer until the soap dissolves. Cool the mixture. Add glycerin and essential oil. Mixture will thicken as it cools completely. Store in glass jars with lids and transfer to a squeeze bottle as needed. Place under hot water to liquefy if the gel becomes too thick.
~~~~
#3 Strawberry-Lemon Shower Gel
1/2 tablespoon of unscented natural liquid soap
3 large frozen strawberries
1 teaspoon of salt
1 tablespoon of aloe Vera gel
6 to 8 drops of lemon essential oil
5 drops of strawberry fragrance oil
Thaw fruit and puree in blender or food processor. Pour into a bowl and add salt. Stir, and then add aloe Vera gel, liquid soap, and essential oil. Mix well. Use immediately.
http://www.essortment.com/all/showergelrecip_tuog.htm
~~~~
Ingredients
Directions
http://www.recipezaar.com/Homemade-Shower-Gel-Recipe-92166
~~~~
Scented Shower Gel Recipe
By Pioneer Thinking
Ingredients:
Directions:
Pour shampoo into a bowl and add the water. Stir until its well mixed add the salt and fragrance.
Suggestions for scents:
Mix and match or use one alone. I personally like the raspberry and vanilla mix...smells so good!
Cornmeal Skin Facial
For oily or combination skin.
1 tablespoon dry cornmeal
2 eggs
Cleanse face, steam, splash with cool water and pat dry. Massage with the dry cornmeal. Rinse off. Then apply a mask made by whipping the eggs and brushing on face. Leave on for 20 minutes; rinse off.
http://recipegoldmine.com/beautyskin/cornmeal-skin-facial.html
~~~~
Heavenly Mask
1 tablespoon yogurt
1 egg yolk
1 tablespoon honey
Mix gently and let stand until paste reaches room temperature. Smooth mask onto clean face, and lie down for 20 minutes. Rinse off with tepid water. Apply astringent and moisturizer.
http://recipegoldmine.com/beautyskinF/heavenly-mask.html
~~~~
Lemon Facial Mask
For dry skin.
2 egg yolks
1 teaspoon olive oil
1 teaspoon lemon juice
Mix ingredients together. Wash your face, spread on the mixture, leave it on for ten minutes, then wash it off.
http://recipegoldmine.com/beautyskinF/lemon-facial-mask.html
~~~~
Peel-Off Mask
1 packet unflavored gelatine
1/2 cup fruit juice or herb Infusion
Heat together gently to dissolve the gelatine. Let cool until almost set Apply to face, let dry completely, then peel off.
2 teaspoons plain yogurt
1/2 teaspoon honey
1/2 teaspoon lemon juice
3 capsules vitamin E (equivalent of 300 units)
Combine yogurt, honey and lemon juice. Prick open the vitamin E capsules and fold contents into the mix. Leave on skin for 15 minutes
http://recipegoldmine.com/beautyskin/aging-skin-fighter.html
 Recipe #1 – Brown Sugar Scrub
1/2 cup of brown sugar
1/4 cup of almond oil
1/4 cup of liquid Ivory hand soap
1/4 tsp of vanilla
Recipe #1 – Brown Sugar Scrub
1/2 cup of brown sugar
1/4 cup of almond oil
1/4 cup of liquid Ivory hand soap
1/4 tsp of vanilla
 Do you have dry, rough patches on your feet?
Here’s a simple treat that you can pamper yourself with while giving your tootsies some TLC.
Homemade Foot Therapy Scrub
Ingredients:
3 TBS used coffee grounds (fine)
1 TBS flour
1 TBS heavy cream (whipping)
1 tsp cornmeal
1 to 2 tsp olive oil (extra-virgin)
2 drops lavender essential oil
2 drops tea tree oil
Directions:
Do you have dry, rough patches on your feet?
Here’s a simple treat that you can pamper yourself with while giving your tootsies some TLC.
Homemade Foot Therapy Scrub
Ingredients:
3 TBS used coffee grounds (fine)
1 TBS flour
1 TBS heavy cream (whipping)
1 tsp cornmeal
1 to 2 tsp olive oil (extra-virgin)
2 drops lavender essential oil
2 drops tea tree oil
Directions:
All-Natural Moisturizing Kitchen Hand Scrub
. . .Olive oil moisturizes, lemon freshens and is especially good for removing onion and garlic odors from the skin, the sugar/salt combo exfoliates dry skin and renews the appearance of your hands.
Salt can be drying, so you wouldn’t want to make the scrub entirely of salt, but I added a bit for some coarser pieces. If you’d rather, simply replace the amount designated for the salt with additional sugar.. . .
The scrub is made with basic ingredients: Sugar, Kosher Salt, Lemon Zest, Olive Oil, Pure Lemon Extract (optional).
Combine all ingredients in a bowl and mix well.
If you would like a slightly stronger fragrance, add the extract.
Spoon into a pretty jar, tighten the lid.
Wipe any spills or drips from the outside of the jar.
Alternatively, you can use orange or lime zest for a different fresh citrus smell. For an extra touch, tie a pretty bow around the jar if you plan to gift this scrub. This makes enough for a 1 pint canning jar
http://keepitcheap.blogspot.com/2009/07/home-made-kitchen-hand-scrub.html
Professional teeth whitening isn't cheap – and even the home whitening kits are a bit of a splurge. The good news is that you can whiten your teeth without using either one.
Just wet your toothbrush, and dip it into a box of baking soda. Then, brush your teeth, and rinse. Repeat regularly, and you'll have whiter teeth at a price that you won't feel guilty about.
Why This Works
When mixed with water, baking soda creates a thick paste that's perfect for scrubbing away the stains on your teeth, and because it's applied with a toothbrush, it even does a good job of reaching and removing the stains that form between your teeth – something most whitening kits can't do.
The Benefits of Baking Soda Whitening
Baking soda is the clear winner among whiteners when it comes to price, but that's not its only benefit. Baking soda is also:
http://frugalliving.about.com/od/beautyhealthcare/qt/Teeth_Whitener.htm
Looking for a cheap and natural way to freshen your breath? Then, try this simple mouthwash recipe:
Add half a teaspoon of baking soda to half a glass of water, and use it to gargle – an instant fix for even the worst case of bad breath.
Why This Works
Baking soda neutralizes the odors in your mouth, rather than just covering them up.
Benefits of Using Baking Soda Mouthwash:
Tips:
1. Keep some baking soda in your purse or briefcase, and you can even freshen your breath on the go.
2. Add a drop of peppermint oil for a minty taste.
3. If you prefer to make up big batches, boil your water, and add a teaspoon of baking soda for every eight ounces of water. Store in a sterilized container.
http://frugalliving.about.com/od/beautyhealthcare/qt/Mouth_Wash.htm?once=true&
Struggling to get your acne under control without draining your wallet? Then, give a baking soda face mask a try.
What You Need:
What You Do:
1. Mix the baking soda with a small amount of water to form a paste.
2. Apply to your face like a mask, and leave on for 15 minutes.
3. Rinse off; and follow up with a light moisturizer, if needed.
Why This Works:
Baking soda dries up the oil on the skin, speeding the healing of existing blemishes and minimizing the occurrence of future break outs.
Benefits of Treating Acne with Baking Soda:
http://frugalliving.about.com/od/beautyhealthcare/qt/Acne_Remedy.htm
~~~~
Here's what she says about herself and this "recipe"
This is an old Asian beauty secret passed down from generations in The Young family. I am Chinese and Polish which has it's advantages and is fun. It makes your skin feel great and smooth. I am a professional makeup artist and use this on my celebrity and girl next door clientele. Click here to see the original post
Now, here's the 'recipe'. Doesn't get any easier than this. Give it a try and let us know what you think.
Ingredients
* 1 glass of drinking water
* 1/2 cup of Asian jasmine rice (found at the Asian market)
photo credit: WikiMedia
Directions
1. Rinse the rice in the sink in a bowl quickly.
2. Next place the rice in a see through glass with the drinking water.
3. Let the two to sit for an hour or so. A milky water liquid will form.
4. This is your mask .
5. Place this opaque watery solution on your face with a cotton ball or a mask face brush.
6. Apply to your neck as well.
7. Leave on 10 minutes. Rinse well.
8. Your skin will feel silky and your pores a bit more refined.
http://keepitcheap.blogspot.com/2008/10/homemade-face-mask.html
 In the DIY world of home health and beauty products, deodorant seems to be the the most feared replacement. Stinking is NOT OKAY in our culture, right?
But aluminum crammed in your pores cannot be good for you, and it seems in recent years that store-bought deodorant is becoming less and less effective anyway. This deodorant uses a natural moisture absorber (cornstarch), a natural deodorizer (baking soda), and a natural anti-bacteria/fungal oil (tea tree oil) to keep any stink from developing in the first place.
So, here’s what I suggest….make this stuff ahead and use it on SATURDAY, or a sick day, or any day you aren’t going to see anyone special, so you’ll feel secure and not look like a nut obsessively sniffing your underarms all day. Once you get over the stink phobia, let your body get used to it, and you’ll never go back.
Homemade Stick Deodorant
1. Put 1/4 cup each of baking soda and cornstarch** in a bowl with 10+ drops tea tree oil. (I like 20 drops, but I’m a tea tree oil nut. I hear lavender oil will work as well.)

2. This deodorant can be used as a powder, but if you want a stick, go to the shortening section of the store and buy this solid-at-room-temperature-awesome stuff:

3. Stir 2+ TBSP in until it’s the consistency you like.

4. Smash into empty deodorant container. (Will be a bit sturdier once it sets a day or so.)

When applying this deodorant, use a lighter hand than you would with normal stick deodorant, especially the first couple of days or it’ll drop little balls on your bathroom rug.
Used correctly, this stuff is invisible and lasts for ages, as it works with a very light layer. You should not be able to SEE it once applied.
**If you have especially sensitive skin, increase the amount of cornstarch to 6T and decrease the baking soda to 2T.
~~~~
 How to Make a Homemade Deodorant (Video)
I will show you how to make a homemade deodorant that works!
http://www.associatedcontent.com/video/25473/how_to_make_a_homemade_deodorant_.html
~~~~
Tired of spending money on store-bought deodorants/antiperspirants, only to find that they let you down and stain your clothes? Then, try this simple – and unbelievably cheap – alternative:
What You Need:
What to Do:
Sprinkle baking soda – a little will do – onto a damp wash cloth, and apply it to your underarms. It'll keep you fresh throughout the day!
Why This Works:
Baking soda absorbs perspiration and neutralizes odors.
Benefits of Using Baking Soda Deodorant:
Tips:
1. If a dry application is preferable, use a duster or brush to apply.
2. For a scented deodorant, mix together equal parts baking soda and corn starch (for shelf stability); and add a few drops of essential oil or a handful of dried flowers (lavender is nice). Then, store in an airtight container.
http://frugalliving.about.com/od/beautyhealthcare/qt/Deodorant.htm
~~~~
Cream Deodorant
1 part petroleum jelly
1 part cornstarch
1 part baking soda
Few drops favorite perfume
Store in a small jar.
http://recipegoldmine.com/beautypersonal/cream-deodorant.html
Make your own bubble bath! A great gift idea.
Materials:
Instructions:
Gently mix together the shampoo, glycerin, and water. If desired, add 10 - 25 drops of water scent of essential oil you desire, and, again, gently mix. Pour mixture into a bottle or jar that can close tightly.
This would make a fun gift! You can decorate the jar if you like. Try stickers, paint, or ribbon!
http://familycrafts.about.com/cs/recipecollections/a/blbubblebath.htm
1 cup instant nonfat dry milk
1 cup baking soda
2 tablespoons cornstarch
1 tablespoon cream of tartar
1 tablespoon cinnamon
1 tablespoon powdered orrisroot
Perfume or essential oils, if desired
Combine all ingredients and store in a pretty container in the bathroom. Add a few sprinkles of the mixture under the water while filling the bathtub.
http://recipegoldmine.com/beautybath/soothing-bath-salts.html
1 cup instant Quaker oatmeal
1 bar mild soap, such as Ivory
1/4 cup water
Food coloring (optional)
Grate oatmeal or use a mini-processor oatmeal. Put into a bowl. Do the same with the soap.
Add the water and blend well. If adding food coloring, add it to the water for even consistency. Shape into balls and put on wax paper to dry.
Balls can be put into containers or wrapped with plastic wrap and tied with raffia. A gift tag can be attached to the raffia.
http://recipegoldmine.com/beautybath/oatmeal-soap-balls.html
Floor Cleaner, Multipurpose (for asphalt, rubber, vinyl, asbestos tiles and resilient linoleum sheets)
1/2 cup liquid chlorine bleach
1/4 cup washing soda
1/4 cup white vinegar
1 gallon warm water
Mix all in a bucket. Mop small areas at a time with a minimum of liquid.
http://recipegoldmine.com/houseD/floor-cleaner-multipurpose.html
~~~~
Floor Shine (for between waxings)
1 cup fabric softener
1/2 bucket water
Mix well. Use to wash the floor.
http://recipegoldmine.com/houseD/floor-shine.html
~~~~
Floor Wax Stripper
1 cup ammonia
2 quarts water
1/4 cup washing soda
Wearing rubber gloves, mix all ingredients in a 1-gallon bucket. Sponge or mop the cleaner onto a small area of floor, getting the floor quite wet. Let sit for 5 minutes to soften the wax. Loosen the wax by scrubbing with the scrubber, then sponge up the cleaner and loosened wax. Rinse with clear water. Repeat for the rest of the floor. If any wax residue remains, repeat the stripping treatment over the entire floor.
Cleaning Metal Surfaces:
Silver - Put some water in a pan with a few teaspoons of washing soda, bring to a simmer. Throw in alittle piece of aluminum foil, and then dip your silver right into the mix. Pull the item out, dry it off, and shine it clean with a rag.
Pewter - Wash your pewter items in warm soapy water (use biodegradable soap!), rinse, and polish with a clean cotton cloth. Instant clean!
Chrome - You can clean anything that is chrome just by combining 1 tablespoon of ammonia with 1 pint of water. Just rub the concoction on the chrome and watch the dirt come right off.
Iron - If you have iron cooking pans or other items that are looking a little rusty, you can clean them with a damp cloth and some steel wool. Wipe down the item with the cloth, scrub lightly with the steel wool, rinse and then dry. Be sure to rub in a little vegetable oil once it is dry to inhibit any further rusting.
Brass & Copper - By combining a few tablespoons of lemon juice and 1 tablespoon of baking soda, you have a great brass and copper cleaning agent. Just rub in on and then polish it off…so shiny! If your items are heavily soiled, you can soak them in hot vinegar and some table salt. The shine will start showing up on its own, and once you see it, take the item out and rinse it. You can also rub lemon on brass and copper to get into any grooves that need cleaning…just be sure to wipe it off once it is clean.
Remove Candle Wax From The Carpet:
First lay the newspaper down on top of the wax and set an iron to low. Once it has warmed up, start running the iron over the newspaper right on top of the wax. Slowly the wax will start melting and get absorbed into the newspaper, lifting up off the carpet. I had to do this once in my old apartment and it worked like a charm There was a little residue and color left over, but it was way better than the big hard chunks of wax that were on the floor.
To Clean Wood Floors:
Before you work on making the floor sparkle, they should be cleaned with vinegar and water. A small amount of vinegar in a bucket of warm water will do wonders for your wood floor. Make sure your floor is sealed and you wring out excess water before mopping the floors, as too much water could damage your wood. That all being said, once they are clean, you can now work on making them shine:
- If you have natural unsealed wood floors (which you probably don’t), you can use linseed oil with a rag, allow it to soak in for a little while, and then mop it up with a little more oil.
- For sealed floors, you can use 1 part white vinegar to 1 part vegetable oil to give it a great shine. Just combine the two, grab a rag, and rub it in like you are polishing a car. The shine will blow you away.
To Clean Appliances:
Microwaves - Mix 1/2 of water with a few teaspoons of baking soda in a microwave safe bowl. Put the bowl in the microwave and run it for 2 minutes. Take out the bowl and wipe it clean with just a rag; every last spot will come out!
Ovens - You can rub the inside of your oven with wet steel wool to remove the tough stuff, and then sprinkle baking soda throughout the oven. Let it sit for a few minutes, then just wipe it all clean with a wet rag…all done and no caustic chemicals!
Coffee Makers - When the coffee maker is empty, pour in a mixture of 1 cup white vinegar and some hot water to fill up the reservoir to the top. Run the coffee maker like you were making coffee, just without any beans in it. Once the cycle has finished, run it twice more with just plain water, which will rinse out the vinegar and any build up left inside. The coffee will taste better the next time you make a cuppa Joe!
Refrigerators - Baking soda all the way…why would you want to spray chemicals in the giant box that holds your food! Make a nice paste from baking soda and water (equal parts of both) and scrub away. Wipe down with a clean cloth and all will be clean!
Removing Stains:
- On white items, apply white vinegar or lemon juice to the stained area. Allow to soak in to the fabric then wash as normal. The stain should come right out as if it had never been there!
- If you happen to spill wine onto your clothes, grab the salt before doing anything else! Dump some salt on the stained area right away, which absorb a lot of the moisture before it sets. Wash as normal as soon as you can.
- For red wine stains, chocolate or other dark stains that have been there a while, you can try to soak the item in a bowl of glycerine, available from your local grocery or natural store. Soak the clothes for a half an hour and then wash.
- Party guest spills red wine on your nice carpet? Get up as much of it as you can with a wash or dish cloth, then quickly pour white vinegar directly on the spot. Let it soak for a few minutes, then rinse it out with a wet rag. And then berate your party guest!
- If your kids come in covered with grass stains, you can usually get them out by soaking their clothes in either glycerine or or washing soda prior to washing.
To Remove Mold In The Bathroom:
You can use Borax and white vinegar to make a spray that you can aim directly at the mold in the tub or shower. Once you spray it , leave it to sit for 30-60 minutes and then go back in and wipe it off. Presto, the mold will start coming off and you did not have to inhale toxic chemicals to do so. Just mix about 2 ounces of Borax and a cup of white vinegar and you are ready to go. As a back up and a maintenance tip, you can also periodically spray the moldy “areas” with straight vinegar and just let it sit there and soak in. The vinegar will kill the mold that might be growing and it will halt the growth of new mold.
Unclogging Your Showerhead:
Just remove the shower head, find a bowl or cup big enough for it to sit in face down, and fill it with about an inch of vinegar. After letting it sit for an hour or more, remove it from the bowl and run water through it at the sink for a few minutes. Put it back in the shower, and presto, your water pressure is restored.
Removing Rust:
Here is what you need - Salt and lime juice. Yep, that’s it. Already have them in your house? Great, your rust remover is now free. Just sprinkle some salt on the rusty spot and put some of the juice right on top of the salt…but not so much that the salt floats away. You want the mixture to sit right on the rust. Leave it to sit for a few hours and come back with a scrubber and go to work. It won’t take much effort to remove the rust, I promise.
Cleaning the Toilet:
Lemon Juice - I use real lemons by squeezing out the juice. When I am done, I put pieces of the peel down the disposal to clean it out.
OR
Distilled white vinegar - I know you have this already!
And
Borax - Ok, you might not have this one. But it is widely available for a few bucks and its cleaning powers go back years.
You will need to combine the ingredients to make a nice paste in a bowl. Put about 1 cup of Borax and about 1/4-1/2 a cup of either lemon juice or vinegar and it will mix together nicely. All you need to do is spread the paste you just made
into the toilet bowl and let it sit a while. Then come back and scrub it with a scrubbing sponge (we use the washable kind, not the disposable kind) and flush the toilet.
Polish Wood:
The first ingredient is water, of course. Get yourself a spray bottle and put 3 cups of water in there. Once the water is in your sprayer, you will be adding two additional items:
- 4 tablespoons of olive oil
- 2 tablespoons of distilled white vinegar
Add them to the spray bottle and shake the bottle up a little to make everything mix together. That’s it, that is all the wood polish you will ever need. Be sure to test the spray somewhere on the furniture just to make sure you have the mixture right and you will not damage the wood.
Natural Disinfecting:
- You can add 1 teaspoon of tea tree oil to a gallon of water to wash windows, floors and toilets to scrub away the germs.
- To chase away bugs, but a drop of tea tree oil near where they are coming in and you can bet they won’t be coming in that way anymore.
- Lavender oil or tea tree oil can be applied directly to cuts and scrapes where it will cool the pain and help fight infection.
- Mixing a few drops of tea tree oil with some water in a spray bottle can clean mold in the bathroom, disinfect the floor after the dog has an accident, or can clean up after your child has been sick. (or you, after a night like the ones in college)
Clean The Air:
For starters, the easiest way we have found to make things smell better is to use essential oils. In an empty spray bottle I mix water and a bunch of drops from a bottle of essential oils. Done! You can adjust the amount of drops you put in the bottle and of course you can always change the scent any time you want. Right now I have some cranberry scented essential oil in our water bottle…the place smells amazing and it can be sprayed on anything; the couch, the curtains, etc.
- Another thing you can do is to simmer water on the stove in a pot with cinnamon sticks or essential oils in it. However, since this one uses natural gas or electricity, it is not the best choice. Plus, you have to remember to keep your eye on it so it doesn’t burn off and start catching the pot on fire!
- You could also put little boxes of baking soda around the house to absorb any bad odors. We do this for the litterbox. Even though our cat is not exactly a stinker, the baking soda absorbs any strong smells that he might leave behind. This also works great in the refrigerator to absorb the leftover smell from last night’s chili.
- And lastly, you could always get some flowers from your local farmer’s market and put them in vases around your house. The smell of fresh flowers is always a pleasant one and it leaves behind no toxic residue like plug-ins and sprays.
Unclog Your Shower Drain:
Step 1 - Put the DRY baking soda down the drain. I use about 3/4 of a cup.
Step 2 - Pour 1/2 cup of vinegar down the drain after the baking soda. Be sure to cover the drain immediately afterwards with a rag or plug, filling the hole completely so nothing can escape. This is because the interaction of the two will cause a “mini volcano” that will want to come up and out of the drain..you want to keep it down there.
Step 3 - Leave this concoction in the drain for about 30 minutes. While you are waiting, boil a tea kettle full of water.
Step 4 - After 30 minutes, remove the plug and slowly pour the HOT water down the drain.
All done! Your drain should flow smoothly now. If not, just do it again. We normally have to do our tub drain often because of the wife’s long hair, but it cleans it out every time.
And there you have it! An easily accessible natural cleaning list. If you have any additional tips or ideas, please let everyone know in the comments!
http://www.thegoodhuman.com/2007/11/05/the-natural-way-to-clean-everything-in-your-house/
Here is how to clean those toilet stains.
1 cup borax
1/4 cup lemon or vinegar juice
Mix, then pour into the toilet bowl. Let sit for about 15 minutes, then scrub the stains away.
Carpet cleaners don't have to be expensive to work well. In fact, they don't even have to be bought in a store. Make up your own spot remover and steam cleaning solutions, and enjoy clean carpets for less.
INGREDIENTS:
Homemade Spot Remover
Mix white vinegar and baking soda together to form a paste. Then, work the paste into the carpet stain with an old toothbrush, or something similar. Allow the paste to dry; then vacuum up the baking soda, and the stain should be gone.
Note: Some stains may need to be treated more than once.
Homemade Cleaning Solution for Steam Cleaners
Fill the machine with equal parts white vinegar and warm water; then, clean according to the manufacturer's instructions.
Why This Works
The acetic acid in vinegar dissolves stains and also neutralizes odors. Just what you need to clean carpets!
Benefits of Cleaning with Vinegar
Warnings
1) Test on a small area before using on the entire carpet
2) As with any cleaner, you should avoid all contact with the eyes and prolonged contact with the skin
http://frugalliving.about.com/od/householdsavings/qt/Carpet_Cleaner.htm
Here's an alternative to the expensive daily shower cleaners. I am a Tilex user and this idea seems much better to me. Plus, it's a whole lot cheaper.
Daily Shower Cleaner
In a 32 oz. spray bottle, pour in 8 oz. of rubbing alcohol then 24 oz. of water. After each shower, spray the walls and shower curtain. You won't have to rinse. For general shower cleaning, here's a good idea
Shower Cleaner
Mix equal parts-
water
vinegar
rubbing alcohol
Add a drop or two of liquid dishwashing liquid.
Pour into a spray bottle.
What's your shower cleaning ideas?
http://keepitcheap.blogspot.com/2007/10/shower-cleaners.html
~~~~
DAILY SHOWER SPRAY (makes 1/2 gal.)
Use an empty 1 gallon container to mix the solution. Use:
1/2 cup "Arm & Hammer Washing Soda" (find in store by laundry soaps) - put in empty gallon container
1 quart hot (from tap) water - add to A&H Washing Soda; shake to disolve
1 quart cold (from tap) water - add to mixture (in gallon container)
1/2 cup white (clear) vinegar - add to mix (in gallon container)
Give a few last shakes to combine. Pour into spray bottle for use in the shower.
http://www.thriftyfun.com/tf905974.tip.html
~~~~
Bryan's recipe works great. If you want to make it up ahead of time, leave out the hydrogen peroxide and make a gallon of base solution from:
3 C rubbing alcohol
1 Tbsp dish detergent
4 Tbsp rinse agent (e.g. Jet Dry)
3 Qt water
To fill a 32 oz. spray bottle add 2/3 C hydrogen peroxide and fill with base solution. For a 24 oz. bottle use 1/2 C peroxide and top off.
http://www.thriftyfun.com/tf905974.tip.html
~~~~
I've used this on our new shower for years: works great!
for a 24-oz spray bottle:
1/2 c rubbing alcohol
1/2 c hydrogen peroxide
6 drops Dawn dish detergent
1 capful (about 2 tsp) Jet Dry
fill to 24-oz with water (distilled or purified if you have it)
Don't make up a big batch to refill because the H2O2 doesn't last very long and turns into good-old H2O. The H2O2 dissolves proteins (like sloughed skin and body fluids - yeech!), the alcohol and Dawn dissolve oils, the Jet Dry suspends the minerals.
Looking for a way to freshen your home--and it's contents – without the help of a store-bought air freshener or spray? Vinegar is the answer:
To freshen rooms, carpet, shoes, trash cans, diaper pails and other sprayable surfaces:
Simply fill a spray bottle with white vinegar, and spritz wherever a freshening is needed. It'll neutralize the odor, so that your home smells like your home.
To freshen refrigerators, lunch boxes and other wipeable surfaces:
Soak a sponge or rag in vinegar and use it to wipe down the entire surface of the item that you wish to freshen. Then, allow the vinegar to dry; and the smell should be gone.
Q: Won't this leave my home smelling like vinegar?
A: Not at all. The vinegar smell will vanish as soon as it dries, leaving your home odor-free.
Why This Works
The acetic acid in vinegar absorbs odors.
Benefits of Deodorizing with Vinegar
Warnings
1) Do not reuse empty cleaner bottles. Buy a new bottle to use for your vinegar spray
2) Keep out of the reach of children
http://frugalliving.about.com/od/householdsavings/qt/Air_Freshener.htm
~~~~
Homemade Febreze
2 cups fabric softener
2 cups baking soda
4 cups hot water
Purchase a large spray bottle. Dissolve the baking soda in the hot water; allow to cool completely. Put fabric softener (Downey is a good one to use) in it and fill the spray bottle. Spray it lightly on furniture, curtains, carpets and bedding for a nice fresh scent.
4 parts borax
2 parts all-purpose flour
1 part cocoa powder
Mix; sprinkle where pets and children cannot get to it.
http://recipegoldmine.com/houseC/cockroach-control.html
~~~~
Roach Balls
1 cup borax
1/4 cup granulated sugar
1/4 cup chopped onion
1 tablespoon cornstarch
1 tablespoon water
Make a paste of the ingredients and roll the paste into little balls.
Place 2 or 3 balls into a sandwich-size plastic bag and leave the top open. Place the bag anywhere you have a roach problem. The roaches will eat the balls and carry them away. The bugs die at home, out of sight. The borax clogs their breathing passages. The onion scent draws them in.
Makes about 50 balls; about 10 applications.
CAUTION: Hide these bags carefully so that children and pets can't get at them.
2 cups warm water
2 tablespoons baby shampoo
2 tablespoons baby oil
Mix these ingredients. Soak heavy, white paper towels in this solution and tuck into used baby wipes containers or plastic bags to use in the nursery.
http://recipegoldmine.com/house/baby-wipes.html
~~~~
Better Baby Wipes
Source: Chyrel and Dotty
This recipe is from a pediatrician.
I've seen some recipes on Dollar Stretcher for baby wipes, but none mentioned boiling water! When you boil the water it cuts down on the bacteria and the wipes are good for months, not weeks! I used this recipe for my two babies and it worked great! I saved a lot of money doing it this way. Keeping a container of wipes in the car is convenient, too.
2 cups boiling water
2 tablespoons baby bath
2 tablespoons baby lotion (any lotion may be used)
1/2 roll of Bounty Paper Towels (This brand holds together well.)
Boil water; pour water, baby bath and lotion in round container. (Look at Wal-Mart for a round Rubbermaid 10-cup plastic container.)
Put in 1/2 roll of Bounty. Invert container after a few minutes for even distribution.
Take out cardboard; unroll from center.
Egg Shampoo
1 egg
1 tsp olive oil
1 tsp lemon juice
1 Tbsp castile soap
1/2 cup water or herbal tea
Drop of fragrant essential oil of your choice (optional)
Combine all in blender and whip until smooth. Shampoo with mixture using warm, not hot water for the shampoo and rinse. Store any remaining shampoo in the refrigerator for use the next day.
http://keepitcheap.blogspot.com/2008/03/homemade-shampoo-recipes.html
~~~~
Easy Homemade Shampoo Ingredients
Let's Make Shampoo!
You can use this shampoo as-is or as a base for specialized recipes for oily hair, dry hair, dandruff, etc.
http://chemistry.about.com/b/2009/01/10/homemade-shampoo-easy-recipe.htm
~~~~
Shampoo Ingredients
Let's Make Shampoo!
You may have noticed that many shampoos are pearlescent. You can make your homemade shampoo glittery by adding glycol distearate, which is a natural wax derived from stearic acid. The tiny wax particles reflect light, causing the effect.
http://chemistry.about.com/od/cleanerchemistry/a/makeshampoo.htm